From Code to Container: The Art of Dockerizing Your Applications
Unlocking the Potential: A Deep Dive into Dockerizing Your Code-base
Introduction
Hi fellow developers and tech enthusiasts! In modern software development, the quest for efficient deployment and scalability is a challenge. Enter Docker, the game-changer that promises to revolutionize how we deploy and manage applications.
This article is a compass, guiding you through the art and science of Dockerizing your applications. In this example am going to guide you on how to dockerize the existing node.js application as example.
Setting Sail into Docker Seas
What is Docker?
Docker is an open platform for developing, shipping, and running applications. Docker enables you to separate your applications from your infrastructure so you can deliver software quickly. With Docker, you can manage your infrastructure in the same ways you manage your applications
Docker is a software platform that allows you to build, test, and deploy applications quickly.
Why Docker?
You may have a question about why should I use docker. If you are a developer or, a software engineer. You may used to tell it's working on my computer. If we used docker there is no point in arguing with your team member. As it works perfectly on my machine.
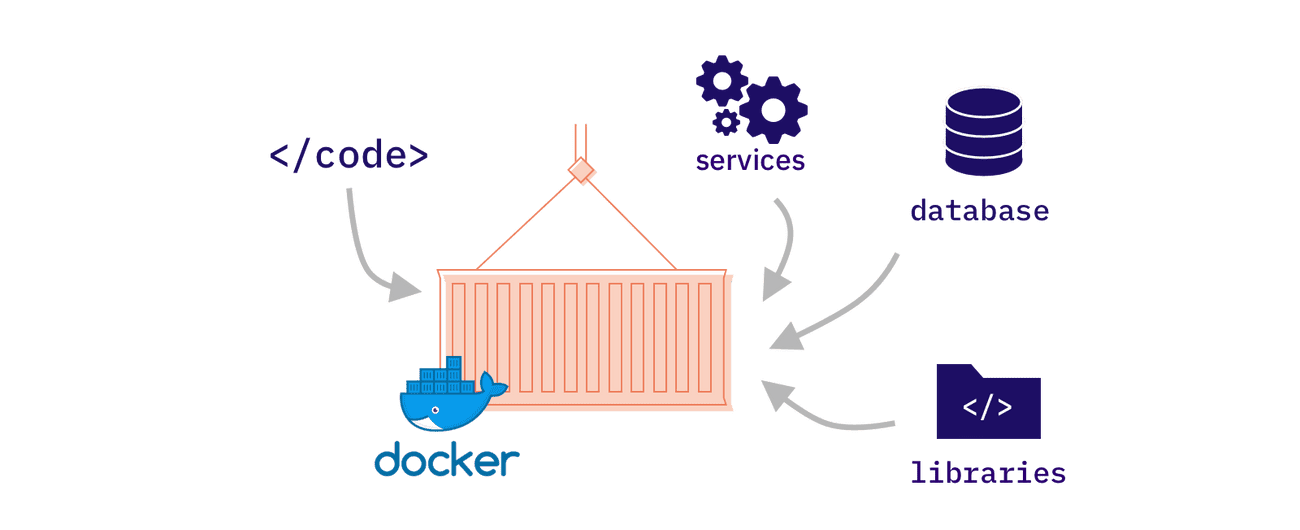
In the modern world new-age software is built using a multiple technology stack & it has lots of dependencies needed on a machine to run that smoothly in development. In a large team keeping track of all dependencies is hard.
It's the same while moving to the production server too. So, docker allows us to ship all the dependencies & essential environments needed to run that piece of software on any machine. This a very high-level view which I have explained to understand the usage apart from more technical jargon.
What are the benefits of Docker? Is Docker worth using?
Easily introduce new developers to your project
How quickly a new developer can start working on your product? Assuming he already has code on his machine, he still has to install some local server, set up a database, install required libraries, and third-party software, and configure it all together. How long does it take? From a few hours to many days. Even if your project has a good onboarding manual that explains all the steps, there is a high chance that it won’t work for every laptop and system configuration. Usually, onboarding a new developer is a collaborative effort of the whole team that helps the newcomer install all missing parts and resolve all system issues.
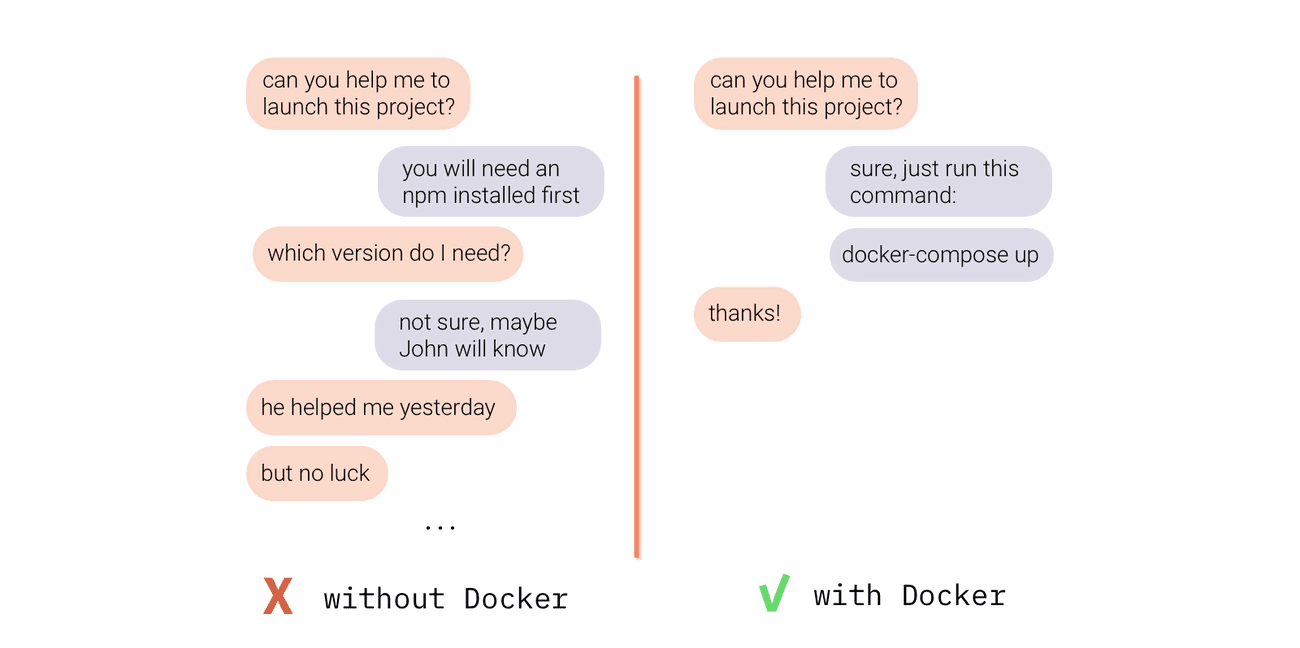
With Docker, all these manual installation & configuration steps are done automatically inside the Docker container. So it is as simple as launching Docker and running one command (docker-compose up), that will do all the work for the developer. No matter if he uses Docker on macOS (macOS with M1 chip), Windows or Linux.
Flexible scaling of your app or website
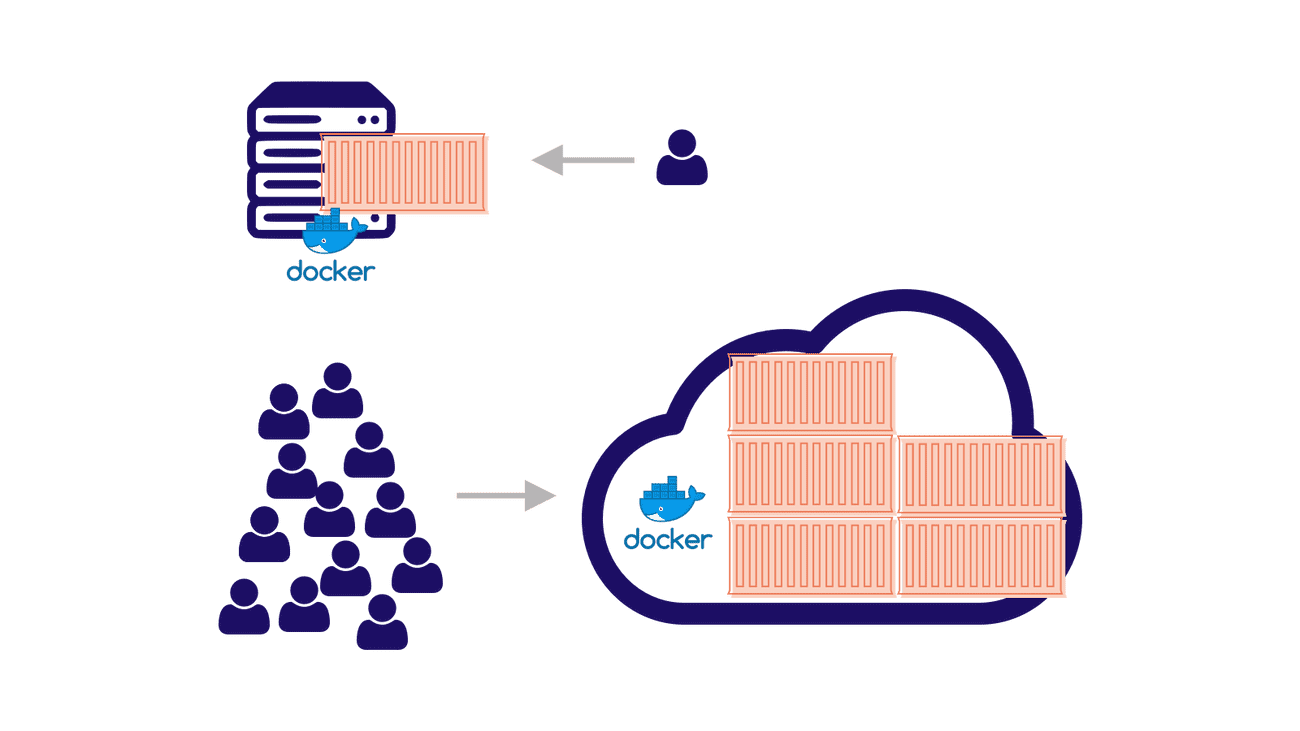
Although using Docker won’t make your website or web application scalable, it may be one of the key ingredients of your software scalability. Especially if you use some cloud services like AWS or Google Cloud as your hosting solution. Docker containers, if built properly, can be launched in many copies to handle the growing number of users. And on the cloud, this scaling can be automated, so if more people use your website, more containers will be launched. The same is true about downsizing, the fewer users, the smaller the bill for your hosting.
How is docker different from Virtual Machines?
If you are not familiar with virtual machines (VMs), just skip that section. But if you do, you may ask yourself the question: how does Docker differ from VMs? These may seem similar at first look because both Docker Containers and Virtual Machines are kind of boxes in which you can put some code and mix it with additional software, files, and configuration.
But each virtual machine requires a separate operating system (like Windows or Linux) installed inside of it. And operating systems are not the lightest pieces of software. So if you have a couple of VMs it may get quite heavy (both when it comes to the disk size and computing resources). Docker containers instead of having its system, use the operating system of the computer/server on which Docker is installed. The whole magic of the Docker engine is that it enables computer resources to the containers as if each Docker container had access to its operating system.
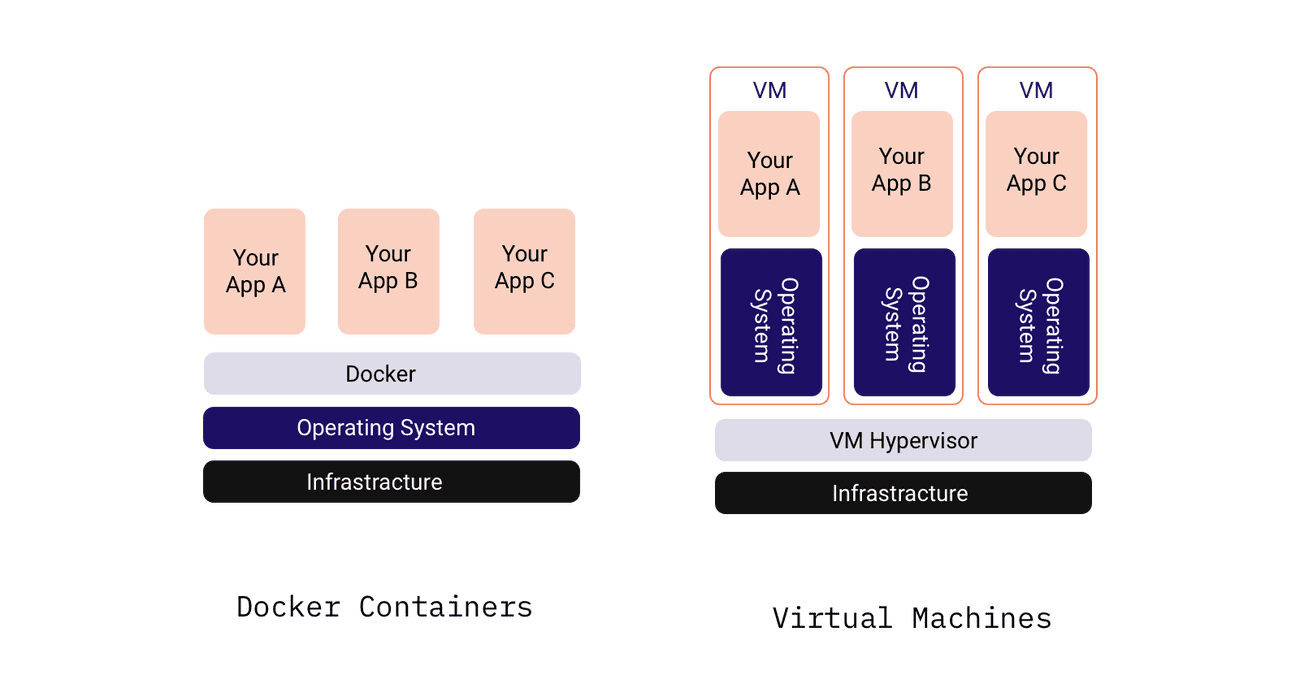
In other words, each VM has its cargo ship that carries it, while docker containers can be carried in bulk on one ship.
Advantages of Using Docker
Before we dive into Dockerizing our existing application in your software development workflow. It’s not a “silver bullet”, but it can be hugely helpful in certain cases. Note the many potential benefits it can bring.
Rapid application deployment
Portability across machines
Version control and component reuse
Sharing of images/dockerfiles
Lightweight footprint and minimal overhead
Simplified maintenance
I hope now you have a basic idea about what is docker & the power it gives you. Now we are going to dockerize the existing self-hosted QR-code-generating application written by me. self-host-QR-code-generator .
Dockerizing the application
Before, diving into the process, There are some more terms to understand while using a docker.
Docker Image
Images are read-only templates containing instructions for creating a container. A Docker image creates containers to run on the Docker platform.
Think of an image as a blueprint or snapshot of what will be in a container when it runs.
Docker Container
A container is an isolated place where an application runs without affecting the rest of the system and without the system impacting the application. Because they are isolated, containers are well-suited for securely running software like databases or web applications that need access to sensitive resources without giving access to every user on the system.
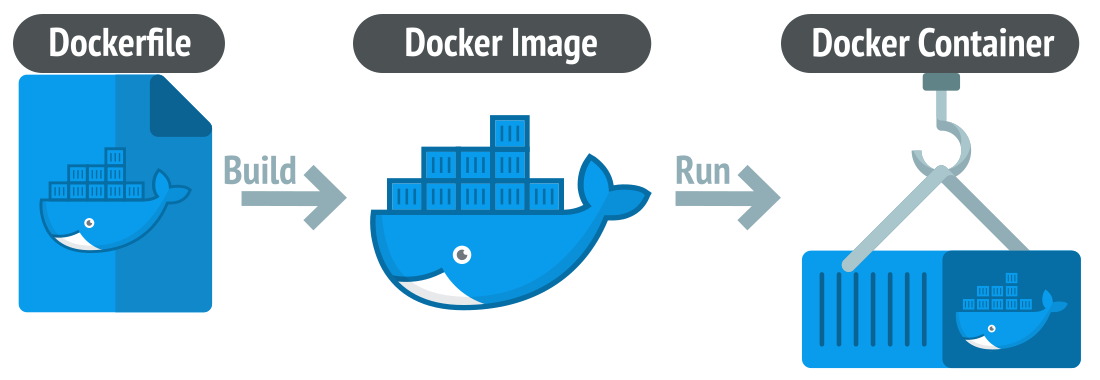
Docker images vs. containers
A Docker image executes code in a Docker container. You add a writable layer of core functionalities on a Docker image to create a running container.
Think of a Docker container as a running image instance. You can create many containers from the same image, each with its unique data and state.
Docker images are created using a Dockerfile, a text file that shows the steps to build the image. Once you have created the image, it can create multiple identical containers, with each running in its isolated environment.
Install Docker
Installation of docker is a straightforward approach just simple clicks & install. Install docker.
Create A Dockerfile
Create a new file named Dockerfile in your project directory and add the following code
FROM node:21-alpine3.17
WORKDIR /app
COPY ./package.json ./
RUN npm install
COPY . .
RUN mv .env.example .env
EXPOSE 3000
CMD [ "npm","start"]
let’s take a look at what this is doing in a little more detail:
FROM node:21-alpine3.17
This line specifies the base image for this Docker image. In this case, it is the official Node.js Docker image based on the Alpine Linux distribution. This gives Node.js to the Docker container, which is like a “virtual machine” but lighter and more efficient.WORKDIR /app
This line sets the working directory inside the Docker container to/usr/src/app.COPY ./package.json ./
This line copies all the files from the local directory to the working directory in the Docker container.RUN npm install
This line installs the dependencies specified in thepackage.jsonfile.COPY . .
This line copies all the source files from the local directory to the working directory in the Docker container.ENV PORT=3000
Using this directive, we make the app more configurable by using the PORT environment variable.CMD [ "node", "start" ]
This line specifies the command to run when the Docker container starts. In this case, it runs the node command with app.js as the argument, which will start the Node.js application.
So, this Dockerfile builds a Docker image that sets up a working directory, installs dependencies, copies all the files into the container, exposes port 3000, and runs the Node.js application with the node command.
Build And Run The Docker Container
Let’s now build this and run it locally to make sure everything works fine.
docker build -t qr-code-app
Once the image build succeeds, we will run the container & test does everything works fine.
docker run -p 3000:3000 --name my_qr_geneator_c qr-code-app
Let’s break this down because that -p 3000:3000 & --name my_qr_geneator_c the thing might look confusing. Here’s what’s happening:
docker runis a command used to run a Docker container.-p 3000:3000is an option that maps ports3000in the Docker container to ports3000on the host machine. This means that the container’s port3000will be accessible from the host machine at the port3000. The first port number is the host machine’s port number (ours), and the second port number is the container’s port number.We can have a port
1234on our machine mapped to the port3000on the container and thenlocalhost:1234will point tocontainer:3000and we’ll still have access to the app.--name my_qr_geneator_cIt's the option to name the container.qr-code-appis the name of the Docker image that the container is based on, the one we just built.
Your Dockerized Node.js app should now be running at http://localhost:3000.
Now, anyone can just install docker on any machine & build this image & run the container to set up or deploy the application.
Publishing on Docker-hub
What is Docker Hub?
Docker Hub is a cloud-based registry service provided by Docker for sharing and managing container images. It serves as a centralized repository for Docker images, allowing developers to store, share, and distribute their containerized applications.
It's more like GitHub. We can publish our docker images as private & public images.
Docker Hub facilitates collaboration among developers and teams. Multiple contributors can work on the same project, pulling and pushing images to Docker Hub, ensuring that everyone is using the latest and consistent versions of containerized applications.
Publishing your own Docker images
Publishing your own Docker images to Docker Hub is a straightforward process. Here's a step-by-step guide to help you publish your Docker image
Build the Docker Image
Use the docker build command to build your Docker image. Replace yourusername with your Docker Hub username, yourimagename with the name you want to give your image, and tag with a version or tag for your image.
docker build -t yourusername/yourimagename:tag .
Log in to Docker Hub
Next, you need to log in to your Docker Hub account using the docker login command. If you already logged in. Feel free to skip this step.
docker login
Enter your Docker Hub username and password when prompted. You may required to generate a personal access token based on your system requirements.
Push the Docker Image
Finally, use the docker push command to push your Docker image to Docker Hub.
docker push yourusername/yourimagename:tag
This will upload your Docker image to your Docker Hub account. Make sure that the image is set to public or private based on your preference and Docker Hub account settings.
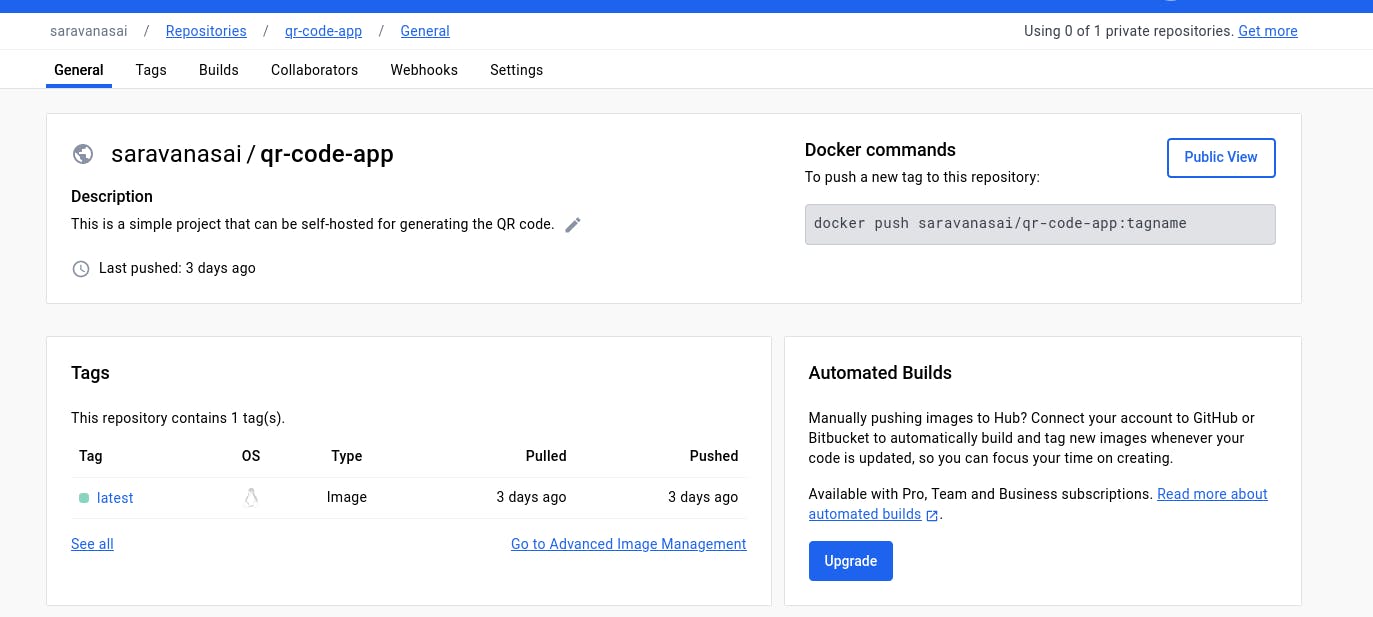
Visit the Docker Hub website (https://hub.docker.com/) and log in to your account. You should see your recently pushed Docker image in your repository.
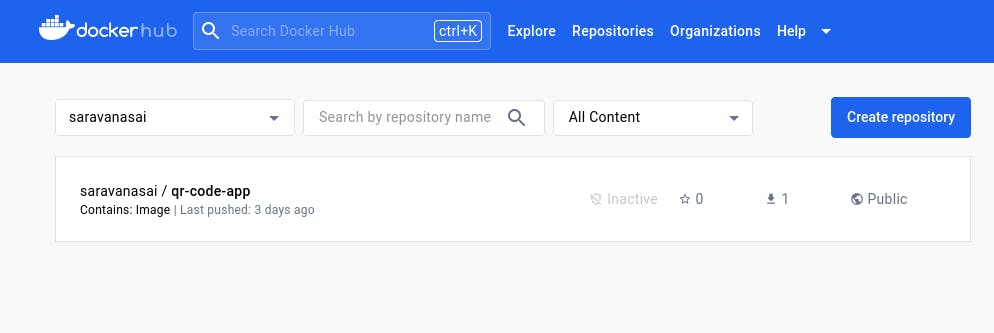
Now this world can see your image & they can use it & collaborate with it.
Conclusion
We’ve taken a Node.js app and Dockerized it, making it easy to deploy across various environments. From understanding the fundamentals of Docker architecture to navigating the intricate process of turning code into containers, we've traversed the Docker seas, encountering best practices, tips, and strategies along the way.
You can reach me for any query, or feedback or just want to have a discussion. Share your thoughts & comments in the comments section to make me understand to the core.
